Another game in my attempt to refight most of the ECW, just not in the right order. This time I chose Nantwich, fought in January 1644 between the forces of Parliament lead by Sir Thomas Fairfax and John Lambert and those of the King, lead by Lord Byron.
Normally I rely on Richard Brooks' "Battlefields of Britain and Ireland" but on this occasion he was more interested in the bigger picture surrounding the overall siege of Nantwich by the Royalists than the main clash of arms. As the battle was fought in the middle of winter a flash-thaw of the River Weaver split Byron's army and trapped his cavalry on the other side of Nantwich. Fairfax blocked these with a small force of cavalry and infantry and then destroyed the Royalist infantry who were formed up near Acton church. Richard is very good on the manoeuvring, less so on the fighting.
Luckily for me I found a good wargaming description of the battle in an old magazine from 1978, written by Stuart Asquith, so I followed that instead.
The Parliamentarians were played by Chris W, and Phil ran the Royalists after I'd handled them for a couple of moves. The pictures this time are taken with my Canon SLR, using a 70-300mm zoom or a 50mm with a super-wide angle attachment.
First some pictures of the set up.

The Royalist artillery occupy Acton church yard.

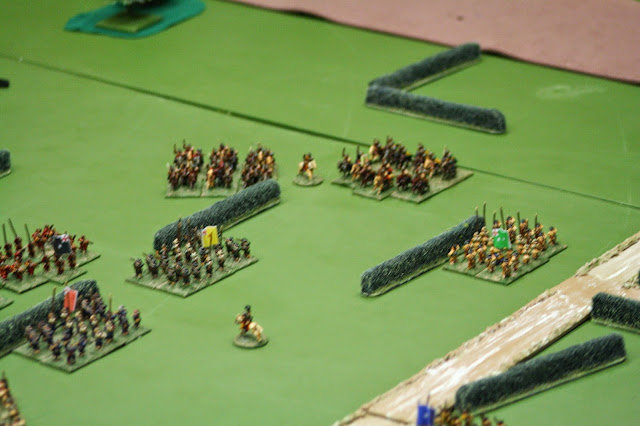
The Royalist position. Five infantry regiments. One is in reserve as a guard against troops sallying out of Nantwich.

The forces of Parliament. Three cavalry and infantry units and one of dragoons. The dragoons are on the far left of the picture, facing off against the church.

Colonel Lambert takes command of the Parliamentarian left wing.

Colonel Gibbons takes command of the Royalist army as Byron has got himself stranded elsewhere.

The starting positions.

Thomas Fairfax gallops into position. The super wide angle lens attachment incorporates a macro lens.

Parliament starts with an aggressive move forward. The middle base is advanced to show the unit is moving. A card needs to be drawn to stop it (unless it bumps into the enemy or terrain).

The end of turn one. We've both advanced. Probably unwisely for me as the Royalists. I was intending to occupy the centre of the board and hold the hedge line in the centre. On reflection this was a mistake as it allowed the position to get flanked.

On Parliament's right the dragoons get up to the wall opposite the church yard and take some ineffective fire from the Royalist guns.

Elsewhere the Royalists get to the hedge line first, but that far end does look exposed.

Dismounted dragoons exchange fire with the artillery. Why Chris chose to do this rather than work them round the flank I do not know and he was unable to explain.

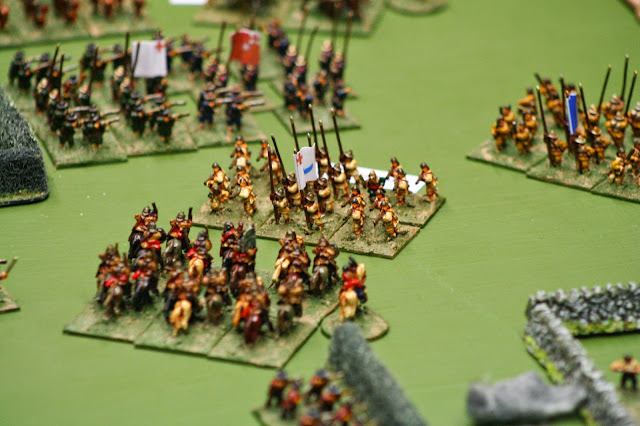
The accompanying Parliamentarian cavalry pin an advancing Royalist tercio with their pistol fire. Under the rules we are using Parliamentarian cavalry cannot charge home without volleying with their pistols first. In any event they can't charge formed foot head on.
On the other flank the remaining Parliamentarian horse has swung itself round to try to roll up the centre. Only downside is the need to gallop past a formed Royalist foot regiment, ready and willing to hit it with enfilading fire.
(There will now be a brief interlude whilst I run the melee system completely incorrectly and get some stupid outcomes. After doing this three times I realise what I've done and we reset the board and run through it again. Luckily we could all agree what the die rolls were.)

So, with the re-working the left hand Parliamentarian infantry unit had been driven off Unsteady (see white label behind them), but the central unit had gained the hedge line. The cavalry had taken a volley and dropped an organisation level.

The Parliamentary cavalry delivered a volley of pistol fire into the end Royalist foot regiment, making them unsteady. They then laid in with their swords and broke them.

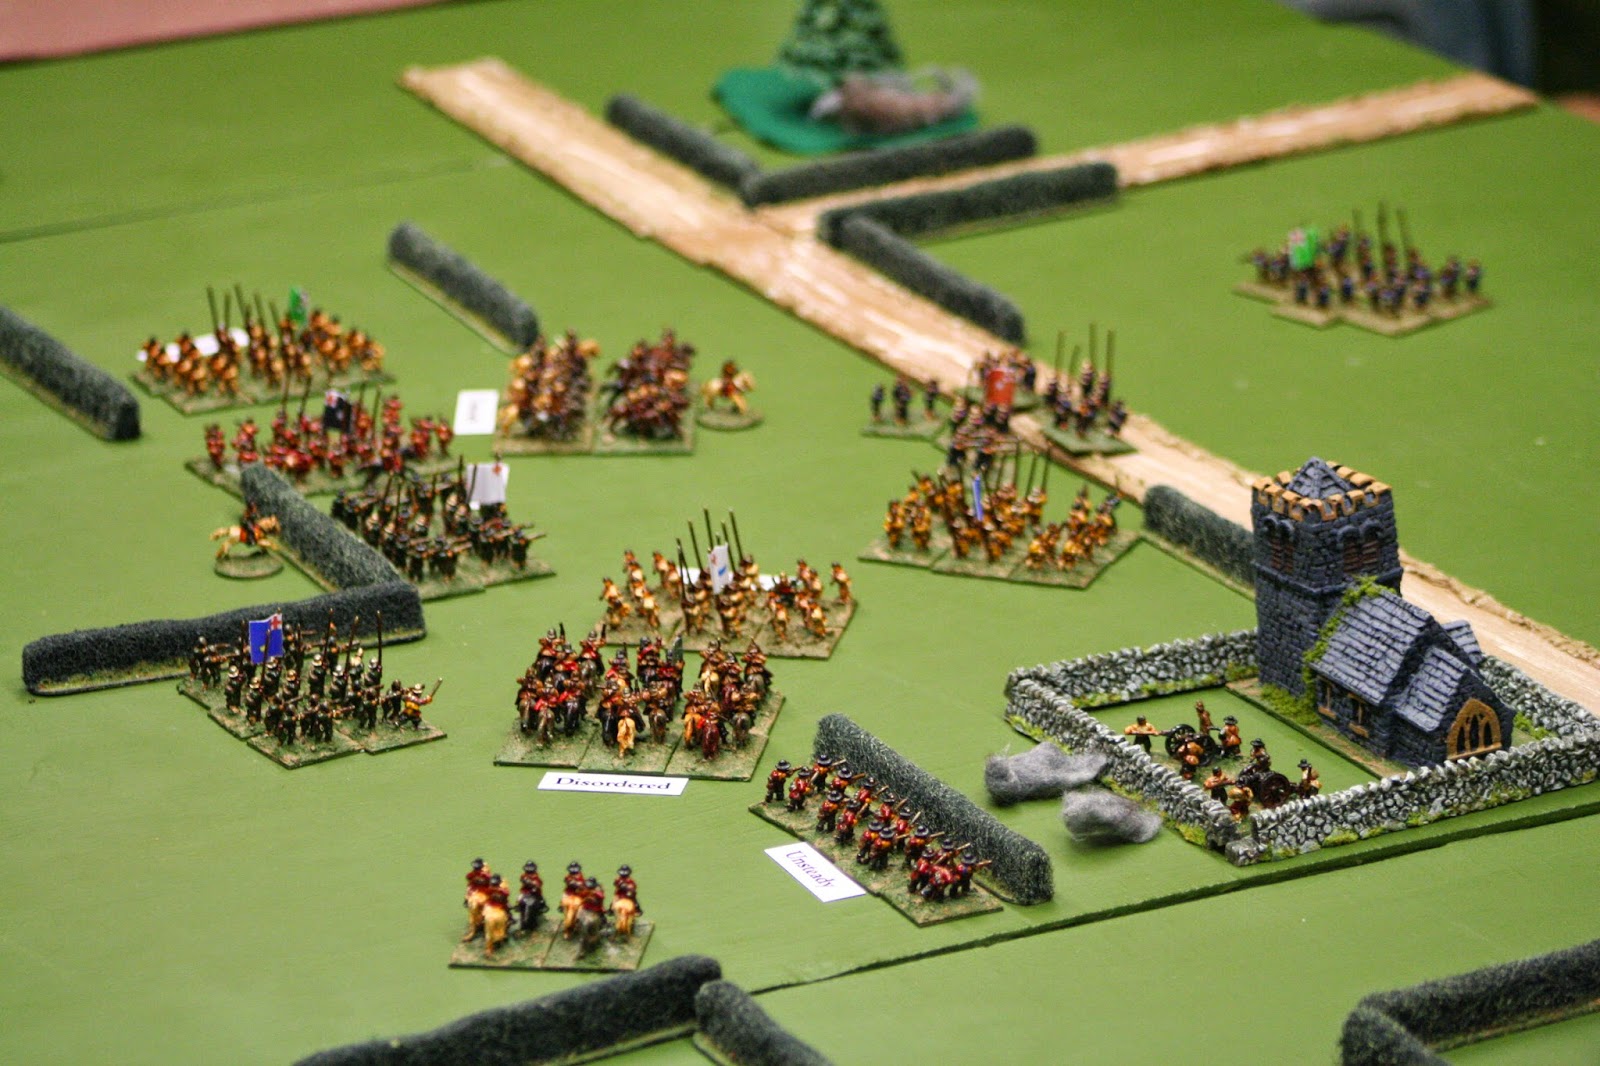
The central Royalist infantry unit counter attacked and got back to the hedge line, However the Parliamentarian cavalry was now pouring through the gap, whilst the left hand infantry unit turned in on the central Royalist foot. By the church the other cavalry had been forced to retire, and the right hand Parliamentarian infantry unit took up the slack.
Reformed, the horse charged in again.....

Cannons roared......

Final attacks were thrown in...

And the Nantwich garrison arrived. By this point the Royalists were pretty much rallying on the church yard, as they did historically, so we called the game as over.
A win to Parliament, as historically. The forces were mostly balanced, but the manoeuvrability of the cavalry proved to be key. This enabled an envelopment whilst the infantry engaged in the centre.
The battle was significant as Fairfax's first big win in the open field, and Byron lost his job to be replaced by Prince Rupert. The aim of preventing more troops joining the King from Ireland was only partially achieved, but some lad called Monk and about 1,000 foot were captured and swapped sides.
A tough, head banging, game for both players. I think the rules held up well, but Phil thinks the d10 and the melee system used in the game gives too extreme results at times. Chris W, in his first game, quite liked them. Any how, decide for yourself. "Victory Without Squares" is available as a down load, top right.
Next week Ceresole with FoG-R.
Normally I rely on Richard Brooks' "Battlefields of Britain and Ireland" but on this occasion he was more interested in the bigger picture surrounding the overall siege of Nantwich by the Royalists than the main clash of arms. As the battle was fought in the middle of winter a flash-thaw of the River Weaver split Byron's army and trapped his cavalry on the other side of Nantwich. Fairfax blocked these with a small force of cavalry and infantry and then destroyed the Royalist infantry who were formed up near Acton church. Richard is very good on the manoeuvring, less so on the fighting.
Luckily for me I found a good wargaming description of the battle in an old magazine from 1978, written by Stuart Asquith, so I followed that instead.
The Parliamentarians were played by Chris W, and Phil ran the Royalists after I'd handled them for a couple of moves. The pictures this time are taken with my Canon SLR, using a 70-300mm zoom or a 50mm with a super-wide angle attachment.
First some pictures of the set up.

The Royalist artillery occupy Acton church yard.

The Royalist position. Five infantry regiments. One is in reserve as a guard against troops sallying out of Nantwich.

The forces of Parliament. Three cavalry and infantry units and one of dragoons. The dragoons are on the far left of the picture, facing off against the church.

Colonel Lambert takes command of the Parliamentarian left wing.

Colonel Gibbons takes command of the Royalist army as Byron has got himself stranded elsewhere.

The starting positions.

Thomas Fairfax gallops into position. The super wide angle lens attachment incorporates a macro lens.

Parliament starts with an aggressive move forward. The middle base is advanced to show the unit is moving. A card needs to be drawn to stop it (unless it bumps into the enemy or terrain).

The end of turn one. We've both advanced. Probably unwisely for me as the Royalists. I was intending to occupy the centre of the board and hold the hedge line in the centre. On reflection this was a mistake as it allowed the position to get flanked.

On Parliament's right the dragoons get up to the wall opposite the church yard and take some ineffective fire from the Royalist guns.


Dismounted dragoons exchange fire with the artillery. Why Chris chose to do this rather than work them round the flank I do not know and he was unable to explain.

The accompanying Parliamentarian cavalry pin an advancing Royalist tercio with their pistol fire. Under the rules we are using Parliamentarian cavalry cannot charge home without volleying with their pistols first. In any event they can't charge formed foot head on.

On the other flank the remaining Parliamentarian horse has swung itself round to try to roll up the centre. Only downside is the need to gallop past a formed Royalist foot regiment, ready and willing to hit it with enfilading fire.
(There will now be a brief interlude whilst I run the melee system completely incorrectly and get some stupid outcomes. After doing this three times I realise what I've done and we reset the board and run through it again. Luckily we could all agree what the die rolls were.)

So, with the re-working the left hand Parliamentarian infantry unit had been driven off Unsteady (see white label behind them), but the central unit had gained the hedge line. The cavalry had taken a volley and dropped an organisation level.

The Parliamentary cavalry delivered a volley of pistol fire into the end Royalist foot regiment, making them unsteady. They then laid in with their swords and broke them.

The central Royalist infantry unit counter attacked and got back to the hedge line, However the Parliamentarian cavalry was now pouring through the gap, whilst the left hand infantry unit turned in on the central Royalist foot. By the church the other cavalry had been forced to retire, and the right hand Parliamentarian infantry unit took up the slack.

Reformed, the horse charged in again.....

Cannons roared......

Final attacks were thrown in...
And the Nantwich garrison arrived. By this point the Royalists were pretty much rallying on the church yard, as they did historically, so we called the game as over.
A win to Parliament, as historically. The forces were mostly balanced, but the manoeuvrability of the cavalry proved to be key. This enabled an envelopment whilst the infantry engaged in the centre.
The battle was significant as Fairfax's first big win in the open field, and Byron lost his job to be replaced by Prince Rupert. The aim of preventing more troops joining the King from Ireland was only partially achieved, but some lad called Monk and about 1,000 foot were captured and swapped sides.
A tough, head banging, game for both players. I think the rules held up well, but Phil thinks the d10 and the melee system used in the game gives too extreme results at times. Chris W, in his first game, quite liked them. Any how, decide for yourself. "Victory Without Squares" is available as a down load, top right.
Next week Ceresole with FoG-R.
Nice report, love this table with this beautiful church and, of course, your armies...
ReplyDeleteThe figures are Peter Pig, - the absolute best there is in 15mm.
DeleteThe Church, if you pardon the expression, is a Hovel. The walls for the churchyard are from Javis, the railway scenery people (and very reasonably priced too). I can't remember who made the hedges. The road is home made.
The look is improved by using a proper camera. I've been lazy recently, relying on the compact. The lenses on the SLR are by far superior. These pictures were pretty much all taken without flash, just relying on the overhead lights in Shedquarters.
Enjoyable BatRep. Nantwich is not an ECW battle I have gamed. Say, how do you manage to produce so many BatReps? I am becoming spoiled.
ReplyDeleteI don't know that I would recommend Nantwich as we fought it. It is probably more interesting to try and do both this fight and the Byron cavalry action together in some way.
DeleteAs for the number of blog posts...well the aim is to blog each game in Shedquarters and there's usually only one a week. Most of the process means ensuring I photograph as I go along, so it is easier if I umpire. In the last year or so I have often either written the blog on the train commuting to or from work on the following day, more recently I've been able to do the same during my lunch break in the office as I've been driving to work. In both cases I've usually hooked my netbook up to the office wi-fi and uploaded the pictures during the morning whilst I work (I use an SD card reader). Once you kick it off it manages itself pretty much. The pictures then provide the framework for the narrative.
More recently, of course, I've been out of work as my contract ended and I decided to take a short break. The crappy weather here in the UK means the gardening isn't being done, but the blog reports are.
At the end of the day it's the same as painting toys. If you want to do it, chose a method and stay focussed. Don't spend hours watching cat videos on You Tube. Same lessons as in the "how to finish projects" blog.