Sleeves rolled up, need to get back to some rule writing and publishing. Next on the list is the late 17th/early 18th century rules, which now rejoice in the name "From Pike to Bayonet". They're basically "Va t'en guerre" and "Va t'en Ecosse", merged back into one another with some added mechanisms and a whole lot more playtesting.
For a quick game using the new variable "Confidence" rating for troops what would do better than Prestonpans from the '45 Rising, where the complete lack of confidence shown by the British cavalry was decisive. We were down on numbers, only having Jon and Richard available to play. Jon's report on the game is here.

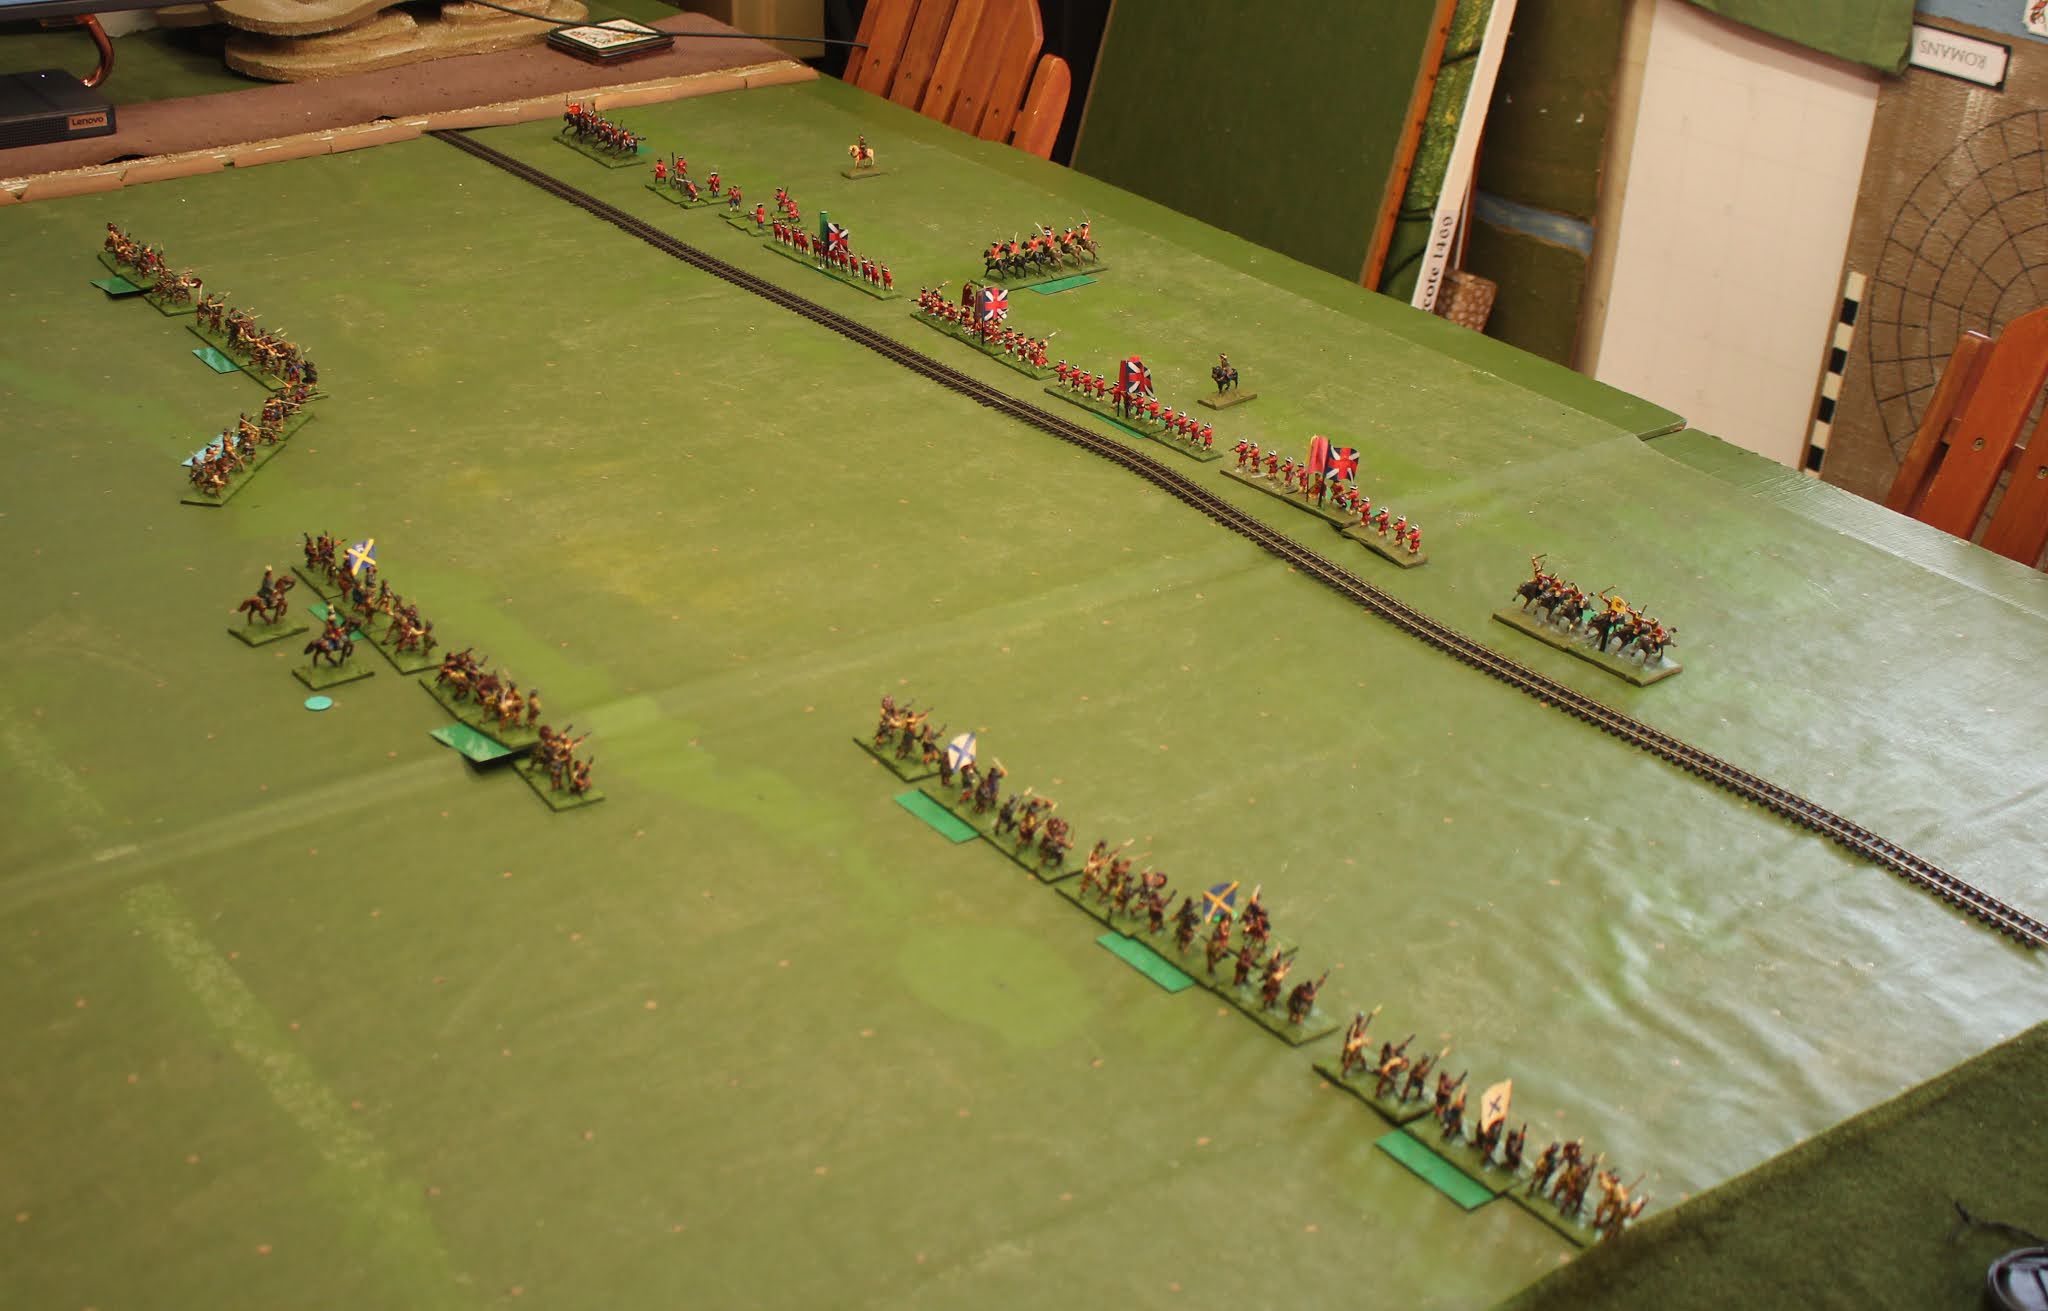
Jacobites are to the left, the British are to the right. Yes, there's an industrial pre-steam rail track, with wooden rails and sleepers. The far end is a ditch that closes that flank off.
The green "tabs" sticking out the back of the units are Confidence Markers. There are four levels from "Fearless" to "Wavering", and they are allocated semi-randomly. The idea is that I'll put in scenarios and that for each brigade you'll be given a mix of predefined confidence cards, which are shuffled and placed. So for the cavalry here there were three units and eight cards, one Confident, three Unsteady and four Wavering. The best you can get then is one Confident and two Unsteady and the worst three Wavering. This should mean commanders have a general idea of how good each brigade is, but not be certain. The British infantry had a 50:50 mix of Confident and Unsteady, with one Wavering, and twice as many makers as units.
The opening positions are as they were historically, with both Jacobite wings wide apart having got separated in the foggy approach march. I need to look at the exact deployments for final publication, as they're probably too far apart.
Turn one, and the Jacobites go first. They move off a little bit tentatively (!) and Jonnie McFreitag rather than heading off madly to turn the flanks angled one of his clans in towards the infantry line.


Jon passed up the chance to rush through the vacant gun line and swung another clan regiment in towards the centre.

On the British left there was a charge/counter charge. Despite being Wavering (+2 is bad in this context) the cavalry charged. The Highlanders let off their volley, and the cavalry lost the melee, dropping to Shaken as well as being Wavering. Not looking good, but at least they didn't run away immediately, and were able to break off.

Jon has slowed his assault to bring Prince Charles' reserves into line. He's aiming, I think, to get all the clans in line and launch a massed charge at the infantry line. In the distance Richard gets clever, and passes his left hand dragoons regiment round the outside of the Highlander left flank.

Richard steps his infantry line forward, and delivers a round of Platoon Fire all along his front. He inflicts quite a bit of damage.


Their neighbours, despite being Unsteady stand in the face of the charge, and with the damage inflicted by their defensive volley, the Highlanders are broken.

On the left of the line, however, the Clans followed up on the retiring dragoons, and broke them.

The result of the first charging units is that the infantry line is holding relatively firm, and there's another Clan fleeing at the far end of the line. Two Jacobite units routing already!

On the right of the line the British battalion stands in the face of the Highland onslaught. Richard's dragoons that had scooted round the flank about faced, and stormed into the rear of the Highlanders.

Surprisingly the Cavalry were bounced (I need to go back and look at the dice scores needed to break the unit attacked in the rear) having inflicted minor damage, but failing to rout the target.

The next round of combat breaks the infantry on the right.

They also break the left hand end of the line.

The centre is more tense, with the British line holding on - just.


It's desperation time now. Richard pushes his left hand battalion in the hope that he can avoid being outflanked whilst seeing off that rallying clan regiment, and maybe, just, kill Prince Charlie.

As a rules writer I was pleased with the general thrust of the game and the eventual outcome. The changes made worked well, and the core mechanisms like the firing and the intimidation test held up fine. There were some issues that are ill defined and I resolved on the fly during the game.
My take on Prestonpans is that the infantry are unfairly maligned. The problem is that the cavalry on the flanks simply cave and flee, the Clansmen then swing in quickly and roll the line up from either end. Given the slowness of infantry formation changes for regulars in the period and the lack of need for much formation for the Highlanders (note to self - this needs looking at) then once the flanks are opened up there's little you can do, regardless of quality. Cope didn't have a lot of choices. He didn't have enough troops to form a second line - which is what makes the difference at Culloden - without ending up with being completely outflanked, regardless of the performance of his cavalry.
I realise this may be at odds with what "everybody knows" about the battle, but it fits the facts better, and is more believable than every British unit was rubbish and ran away when a Highlander shouted at them.
Having read Arran Johnston's On Gladsmuir Shall the Battle Be, it sounds like the cavalry were to blame - once they broke, there was nothing to protect - or steady - the infantry.
ReplyDeleteI'd be interested to see your rules. Hopefully they will be published at some point?
I'm hoping to publish in the late autumn.
DeleteSome very interesting ideas on troop quality in your game, which adds a nice friction to the game as you don't quite know how they will perform. My thoughts on the cavalry charging the Highlanders in the rear is that they would probably be automatically broken, but maybe that's just my view rather than anything 'historical' if you see what I mean.
ReplyDeleteWe played a version of the battle as part of a campaign a few years ago, which is linked below:
https://wwiiwargaming.blogspot.com/2019/11/brexite-campaign-battle-for-prestons.html
I'm rationalising it as the cavalry bottling it at the last minute, but I agree with you. I need to look at the odds of it happening (as it actually happened twice) to decide if it's a fluke or a likely outcome. My only concern in making it an automatic outcome is that in the '45 nothing seems to be completely certain. Thanks for the link to your game. Another player who breaks scenarios by rolling a lot of 1s.
DeleteThis event of cavalry attacking Highlanders in the rear happened in another battle too. Recall the battle whether the Government army is caught on the march along the wall? The Highlanders hit a unit in front of the wall and then I charged the Highlanders in the rear with my cavalry as the Highlanders were engaged to their front? The Highlanders did not break but simply hopped the wall to safety after having routed their opposition. My cavalry were then hit in rear by another Highlanders unit and scattered.
DeleteI clearly have a problem with this part of the rules. Not letting units attacked from behind roll any dice might help.
DeleteFor the first Turn of combat, not being able to defend oneself works quite well I think, then if they survive for another Turn, then the combat die can be halved if they are defending to their front and back.
DeleteOne could argue that the poor quality cavalry early on wouldn't have the same 'impact' in combat against close quarter armed Highlanders. However I think there should be some penalty for being caught in the rear in some shape or form.
If the poorer cavalry charge - and they have modifier increasing their chance of defaulting - and contact the rear, then I think they should do some damage. From the front they're likely to be intimidated even if they do charge. One of Richard's units in this game lucked out and turned out Confident - i.e. normal cavalry - so should have broken those Highlanders with a rear charge. I'm leaning towards if you lose a melee to a unit behind then for infantry v cavalry it should be an auto break.
DeleteExcellent battle account.
ReplyDeleteWhen you state that,
“ this may be at odds with what "everybody knows" about the battle, but it fits the facts better…”
it ever hurts to have the historical evidence supporting your position.
Have you read my Edgcote book?
DeleteWell, my unfortunate typo/autocorrect, changed the meaning of my response. That should read "it never hurts..." Yes, I have read your Edgcote book.
DeleteThat was a rhetorical response. It's all about the evidence
DeleteGood report. Interesting rules by the sound of them. I'd probably be a little surprised by cavalry bouncing off in that situation too, but being mainly an ancients man my opinion is only worth what has been paid for it!
ReplyDeleteThe player took it really well, but not a result I would persist with. In practice, with one previous exception, most of the battles I have put on in this time frame and with variants of these rules it has been hard to open up flanks as deployments are usually made with flanks secured. The thing with Prestonpans is that if the Jacobite player knows the cavalry are completely useless for certain then there's no jeopardy in what they choose to do. I'm hoping I am close to fixing that issue.
DeleteThere are many reasonable options for addressing this situation. Looking forward to seeing which route you travel.
DeleteI would feel that either side should fear having cavalry on its flanks or in the rear, as they wouldn't know how effective the may or may not be. That uncertainty brings a nice level of friction to both sides IMHO.
DeleteJon, no doubt you'll be testing some of my ideas out.
DeleteSteve: yes, there needs to be jeopardy for both players.
It looks like you have almost gotten there with the merged rules. I enjoyed playing the stand alone Jacobite version (even though I was on the loosing side!) so I shall be interested to see how these turn out. I do see the issue with having several tons worth of cavalry hit you from behind and I would imagine (but without any evidence) that executing a rapid about face to deal with the threat might not be all that easy. A 'free hack' as WRG used to term it seems a reasonable solution if the defenders can't turn all or part of the unit to deal with the donkey wallopers!
ReplyDeleteI'm not as close as I thought I was. a lot of ideas still bouncing off the inside of my skull. My reading on Killiekrankie is modifying how I thought pikes and pug bayonets were used.
Delete