I don’t know when something becomes a tradition. Is two years a tradition or just coincidence?
I’ll go for two years. So, this Wednesday Phil & I had our traditional Society of Ancients competition game of Armati. Come to think of it, it must be a tradition, otherwise why would Phil have driven 10 miles in the snow for a game. Got to be something other than the pleasure of my company and a guaranteed easy win.
Last year’s game featured an appearance from the Christmas Cracker toys of the title. This year, because Mrs Trebian was otherwise engaged, they failed to turn up, so we just had to focus on the game.
The run up to this game started several days before hand. We know we’re going to do 15mm Armati, - all of Phil’s ancient armies are in 15mm and I don’t play any “competition style” rules except for Armati. The question is what period and what armies. The problem for me is that I only have three 15mm ancient armies, - Trajanic Romans, Parthians and Germans – whilst Phil has….lots. So we have the discussion about what sub-period we’re going to play in (obviously from my end it has to be the one with my three armies in) and then Phil reminds me that my Wars of the Roses stuff is covered by the rules and he has some Italian Armies that are sort of contemporary. I consider this for a while. I had a cunning plan to bore Phil into a long drawn out stand off where he loses the will to live and I get a draw. However it would be nice to have an excuse to get the WotR stuff out, so having checked the official listings I reckoned I’d be in with a chance. After all Italian armies have all sorts of fancy finesse style units but I can max out on longbows and turn him into a pin cushion. (How gamey does that sound? I can only hope the spirit of Dr Griffith can forgive me).
The Armati 2 WotR army list is a bit rubbish. It has all sorts of odd bits and pieces (Irish javelins, anyone?) that aren’t really prime features of the army, but doesn’t have any mounted borderers or scourers. So I popped in the equivalent from another list.
Phil indicated he’d go and check the options for his stuff on Warflute (this is the Armati on-line army resource site, - and jolly good it is too, with loads of interesting lists and discussions). Hadn’t thought he might use something not in the main book, but…..still, not worried, - after all Italians are Italians, aren’t they? I’ll still be able to outshoot them.
As it happens there is an Italian army stuffed with longbows. It’s Sir John Hawkwood’s Free Company (okay, not exactly contemporary). Not only has he got the same number of longbows as me, he’s got a similar number of Cross Bows as well. And more cavalry. Gulp.
Plus, it being Phil he also has a plan. I mean I had a plan as well. It was anchor one wing on a wood, stuff the other flank with cavalry and line up my archers supported by billmen in the middle.
I never said it was a sophisticated plan.
 Phil’s plan was way more clever. He had extra terrain and he had some stuff concealed behind a wood, skirmishing crossbows supported by heavy cavalry, and also a hidden flanking LHI force. Lots of it was deployed where I couldn’t shoot at it.
For final deployment I modified my plan slightly and pulled all of my dismounted men at arms (DMA in Armati speak) back to be in my “reserve area” behind the main line so I could swing rapidly either way to stop my flanks being overwhelmed. I deployed deep to avoid the effects of impetus and to give me extra manoeuvrability.
 There was nothing for it. If I hung back Phil would take me apart piece by piece. I stepped forward with my main line with the intention of sticking arrows in as many of Phil’s exposed troops as I could before those concealed in the woods appeared. Simultaneously although outnumbered I threw my Knights forward on the right flank with the intention of fighting Phil’s crossbow reinforced cavalry as far from my main battle line as possible. At least then if they died horribly it was more than one move before they turned my main line’s flank, giving me time to get the reserve into position to support them.
 On the other wing my scourers found minimal opposition and set off on their mission to get round Hawkwood’s rear. My general was My Lord Beaufort, one of the serial failures that litters Lancastrian leadership. It has to be said that Beaufort was perpetually in the wrong place throughout the whole game.
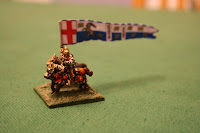
 A bit of back bone was provided by the presence of Queen Margaret. You have to admit she looks magnificent, - although I can't claim this paint job as one of mine. Phil provided me with the finished figure (and two little Princes as well).
I got the better of the initial archery exchanges in the middle, but took a hit on my right wing knights as they closed on Phil’s left wing cavalry. However my bold tactics forced Phil to ride down his crossbows in order to get to grips with me before I forced a two – on – one attack on his extreme left. To even up the combat in the left middle Hawkwood joined the battle against my weakened knight unit. This made a real difference as the die rolling was tied over two rounds, inflicting mutual hits. That meant that as I’d taken a crossbow hit on the run in my knights were broken whilst their opponents held on.
Alas for Phil due to my brilliant tactics/die rolling Hawkwood was killed in the melee, evening up the loss of army breakpoints.
Meanwhile in the middle my arrow storm had already broken one of Phil’s longbow units and inflicted severe damage on his veteran dismounted knights. I think concealing stuff in the wood backfired, - it meant I could focus on one or two exposed units rather than spreading the hits evenly along the line. This also broke his line causing a reduction in his initiative roll. However the flanking LHI were rapidly closing in on the exposed left wing of my main battle line. What to do?
I moved towards Phil’s main line forcing him to move forward to avoid being flanked by my scourers. This freed up the scourers to about face and pile into the LHI. I managed to break the dismounted knights with one of my bill units and inflicted hits fairly heavily elsewhere along the line. Again my die rolling was above par.
The battle was decided over on the right. Some of Phil’s heavy cavalry had broken through and collided with my DMA reserve (an obligatory charge which helpfully got his cavalry away from my more vulnerable units). Over two rounds I got the worst of it with some dreadful die rolling and I lost a unit. I think at this point I’d broken 5 of Phil’s units, and he’d broken 4 of mine. Both of us needed to break 6, so the difference was poor old Hawkwood. Which way would the battle go?
Phil managed to flank my remaining knights with the unit that had beaten my other knights. Even though it was a flank attach it was a bit of a gamble as this was Hawkwood’s unit and so only one point from breaking, and their fighting value was a bit low anyway and they had to disorganise themselves to get into a place to attack me. However I don’t think Phil had a choice as I was likely to break one of the other units I was fighting.
As it was my magic die came to me help and I out-rolled Phil by a sufficient margin to break them and win the game.
Er, sorry? What? Yes. Win. The. Game. Un. Be. Live. Able.
At which point we stopped and made tea & coffee.
PS That’s probably the most battle report-y blog I’ve ever written, so I hope it goes down okay. The pictures, such as they are, were taken with a reconditioned Canon E300 Digital SLR. Hopefully the quality of the display is improved, if not the actual composition of the photos themselves.
PPS Merry Christmas to you all.
I’ll go for two years. So, this Wednesday Phil & I had our traditional Society of Ancients competition game of Armati. Come to think of it, it must be a tradition, otherwise why would Phil have driven 10 miles in the snow for a game. Got to be something other than the pleasure of my company and a guaranteed easy win.
Last year’s game featured an appearance from the Christmas Cracker toys of the title. This year, because Mrs Trebian was otherwise engaged, they failed to turn up, so we just had to focus on the game.
The run up to this game started several days before hand. We know we’re going to do 15mm Armati, - all of Phil’s ancient armies are in 15mm and I don’t play any “competition style” rules except for Armati. The question is what period and what armies. The problem for me is that I only have three 15mm ancient armies, - Trajanic Romans, Parthians and Germans – whilst Phil has….lots. So we have the discussion about what sub-period we’re going to play in (obviously from my end it has to be the one with my three armies in) and then Phil reminds me that my Wars of the Roses stuff is covered by the rules and he has some Italian Armies that are sort of contemporary. I consider this for a while. I had a cunning plan to bore Phil into a long drawn out stand off where he loses the will to live and I get a draw. However it would be nice to have an excuse to get the WotR stuff out, so having checked the official listings I reckoned I’d be in with a chance. After all Italian armies have all sorts of fancy finesse style units but I can max out on longbows and turn him into a pin cushion. (How gamey does that sound? I can only hope the spirit of Dr Griffith can forgive me).
The Armati 2 WotR army list is a bit rubbish. It has all sorts of odd bits and pieces (Irish javelins, anyone?) that aren’t really prime features of the army, but doesn’t have any mounted borderers or scourers. So I popped in the equivalent from another list.
Phil indicated he’d go and check the options for his stuff on Warflute (this is the Armati on-line army resource site, - and jolly good it is too, with loads of interesting lists and discussions). Hadn’t thought he might use something not in the main book, but…..still, not worried, - after all Italians are Italians, aren’t they? I’ll still be able to outshoot them.
As it happens there is an Italian army stuffed with longbows. It’s Sir John Hawkwood’s Free Company (okay, not exactly contemporary). Not only has he got the same number of longbows as me, he’s got a similar number of Cross Bows as well. And more cavalry. Gulp.
Plus, it being Phil he also has a plan. I mean I had a plan as well. It was anchor one wing on a wood, stuff the other flank with cavalry and line up my archers supported by billmen in the middle.
I never said it was a sophisticated plan.
 Phil’s plan was way more clever. He had extra terrain and he had some stuff concealed behind a wood, skirmishing crossbows supported by heavy cavalry, and also a hidden flanking LHI force. Lots of it was deployed where I couldn’t shoot at it.
For final deployment I modified my plan slightly and pulled all of my dismounted men at arms (DMA in Armati speak) back to be in my “reserve area” behind the main line so I could swing rapidly either way to stop my flanks being overwhelmed. I deployed deep to avoid the effects of impetus and to give me extra manoeuvrability.
 There was nothing for it. If I hung back Phil would take me apart piece by piece. I stepped forward with my main line with the intention of sticking arrows in as many of Phil’s exposed troops as I could before those concealed in the woods appeared. Simultaneously although outnumbered I threw my Knights forward on the right flank with the intention of fighting Phil’s crossbow reinforced cavalry as far from my main battle line as possible. At least then if they died horribly it was more than one move before they turned my main line’s flank, giving me time to get the reserve into position to support them.
 On the other wing my scourers found minimal opposition and set off on their mission to get round Hawkwood’s rear. My general was My Lord Beaufort, one of the serial failures that litters Lancastrian leadership. It has to be said that Beaufort was perpetually in the wrong place throughout the whole game.
 A bit of back bone was provided by the presence of Queen Margaret. You have to admit she looks magnificent, - although I can't claim this paint job as one of mine. Phil provided me with the finished figure (and two little Princes as well).
I got the better of the initial archery exchanges in the middle, but
 took a hit on my right wing knights as they closed on Phil’s left wing cavalry. However my bold tactics forced Phil to ride down his crossbows in order to get to grips with me before I forced a two – on – one attack on his extreme left. To even up the combat in the left middle Hawkwood joined the battle against my weakened knight unit. This made a real difference as the die rolling was tied over two rounds, inflicting mutual hits. That meant that as I’d taken a crossbow hit on the run in my knights were broken whilst their opponents held on.
Alas for Phil due to my brilliant tactics/die rolling Hawkwood was killed in the melee, evening up the loss of army breakpoints.
Meanwhile in the middle my arrow storm had already broken one of Phil’s longbow units and inflicted severe damage on his veteran dismounted knights. I think concealing stuff in the wood backfired, - it meant I could focus on one or two exposed units rather than spreading the hits evenly along the line. This also broke his line causing a reduction in his initiative roll. However the flanking LHI were rapidly closing in on the exposed left wing of my main battle line. What to do?
I moved towards Phil’s main line forcing him to move forward to avoid being flanked by my scourers. This freed up the scourers to about face and pile into the LHI. I managed to break the dismounted knights with one of my bill units and inflicted hits fairly heavily elsewhere along the line. Again my die rolling was above par.
The battle was decided over on the right. Some of Phil’s heavy cavalry
 had broken through and collided with my DMA reserve (an obligatory charge which helpfully got his cavalry away from my more vulnerable units). Over two rounds I got the worst of it with some dreadful die rolling and I lost a unit. I think at this point I’d broken 5 of Phil’s units, and he’d broken 4 of mine. Both of us needed to break 6, so the difference was poor old Hawkwood. Which way would the battle go?
Phil managed to flank my remaining knights with the unit that had beaten my other knights. Even though it was a flank attach it was a bit of a gamble as this was Hawkwood’s unit and so only one point from breaking, and their fighting value was a bit low anyway and they had to disorganise themselves to get into a place to attack me. However I don’t think Phil had a choice as I was likely to break one of the other units I was fighting.
As it was my magic die came to me help and I out-rolled Phil by a sufficient margin to break them and win the game.
Er, sorry? What? Yes. Win. The. Game. Un. Be. Live. Able.
At which point we stopped and made tea & coffee.
PS That’s probably the most battle report-y blog I’ve ever written, so I hope it goes down okay. The pictures, such as they are, were taken with a reconditioned Canon E300 Digital SLR. Hopefully the quality of the display is improved, if not the actual composition of the photos themselves.
PPS Merry Christmas to you all.
Nice little battle. I really like the Queen Margaret character,,,excellent painting (as they all are)
ReplyDeleteNice one.
Merry X-mas
Cheers
Paul
As I said President Steele painted Margaret. I did Beaufort. Spent quite some time on him, but that's more detail than I usually do.
ReplyDeleteThe camera flatters my figures quite a bit, but they lok okay. If you're new to the blog check out the Trebian patent painting method which I explained in great detail in November 2009.
Yay... A victory for King Trebian on this day!
ReplyDeleteVerily a miracle has occurred.
ReplyDeleteYes. Nice pictures, Graham.
ReplyDeleteThe idea of concealing Longbows in the wood was an attempt to squeeze some historical tactics out of the game - although 'wargamers lore' associates LB with stakes - whatever you think of Armati's dodgy rules for them - actually, stakes are quite late in the Longbow's history, and quite rare.
For HYW, Free Coy, Hawkwood in Italy etc. more common is the use hedgerows, sunken roads, earthen banks etc. (even digging pits) ...
The best way to simulate this is the standard game is to take an extra wood, and hope to dice this into an influential position.
Unfortunately, the classic wargame tactic of rolling better dice is at least as good as the more authentic tactic of picking a naturally strong position :) I tried both, and didn't get enough from either.
Re my attack on your flank (nimbly dealt with by the scourers) ... an attack from concealment on your flank as your line pressed home against my main position is classic HYW/Hawkwood (Poitiers, Castagnaro etc.) ... however, the task would be given to a trustworthy captain (Hawkwood himself leading the men in at Castagnaro) ...
This is not an option in Armati, so I trusted the critical task to an unreliable band of soldiers of fortune. They bungled it.
It happens. Thanks for the game. Good to see the soldiers out again.
Phil
So, not only did you have a plan you used historical tactics too.
ReplyDeleteIt'll never catch on.
Historical tactics frequently benefited from the enemy being dim AND unlucky.
ReplyDeleteA combination by no means rare in the miniature battle - but opponents all too often refuse to play their part :)
Phil