I'm taking "Tricorn and Bonnet" to WD's COW this weekend coming, where I'll be running to Sheriffmuir scenario from the rule book. I've spent so much time working on getting the rules into print that I hadn't realised that I haven't run a game with the rules since February, the most recent outings being with the Ottoman variant. Better have a quick refresher in that case. I was supposed to run it last week, but I was short of players. As it was Steve was still unavailable, so I made up the numbers with Chris, Phil & Tim.
Sheriffmuir is an odd scenario, being the only proper battle in the '15 rising, and the Government troops involved are mostly reasonably experienced. It's also very much a game of two halves, Brian.


Turn one, and Tim held back, mostly. The one unit of Highlanders up on the Muir mover forwards.

Chris moved all of the Clans forward in a threatening manner.

Over to us. Phil launched two cavalry charges at the units on the end of the line, and was bounced in spectacular fashion. Sometimes the dice have it in for you.

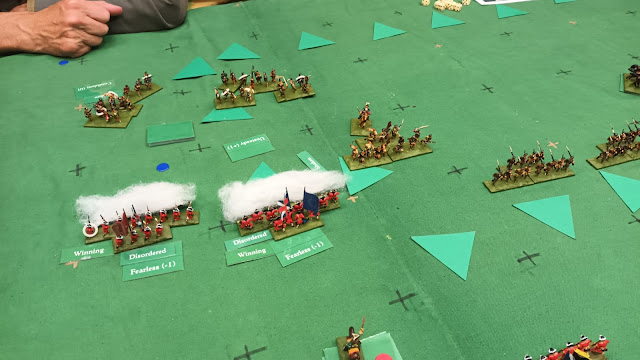
I moved up aggressively with my infantry, gambling on my firepower. I delivered some devastating volleys, and closed with the bayonet. Non-plussed, some of the highlanders were driven back. It was then I discovered that I'd got the unit quality cards mixed up between the highlanders and lowlanders. Chris took it very well, once I'd let him swap them back.

My cavalry were rubbish, however, and were driven off by a combination of defensive fire and some nifty sword work.

Chris counter attacked in the middle, and got my Scots Fusiliers in a pincer movement.

He also convinced his gentlemen riders to relieve the pressure on one of his clans.

I saw off the highlanders, but the cavalry were still stuck in.

I'm giving the highlanders a real going over. On my right, Tim is holding his own against Phil.
I've got some of my infantry up on the ridge now, and have driven off the clan holding that end of the line.

The counter attack begins in earnest, as a clan attacks my exposed flank. They can fire muskets too, you know.

What's happening up the far end? Well, Phil FINALLY gets his cavalry to grips with the Lowlanders, and breaks the end of the line. He's also trying to close with his infantry.

The Scots Fusiliers are done for and are heading for home.

My cavalry is likewise starting to head off the table. One unit has gone, the other two will depart shortly.

In the centre we're involved in a tense melee, but my unit is degrading more quickly.

Phil's infantry is closing on the lowlanders and steadily breaking the units.

Chris has pulled it back on my side, however, and has managed to hang on long enough to break enough of my battalions to cause the flank to break.
That was two hours, and we'd had the classic result, with opposite wings winning the day although a bit closer than historically. I proved to be a little rusty, and need to do a proper re-read of the rules before I run the game again this Saturday.
So, a useful evening for me.
I aim to have finished painting the last of my Scots by the end of next week and look forward to finally taking these rules for a spin. Any suggestion of which scenario to start with?
ReplyDeleteCheers,
Peter.
Prestonpans is the simplest and over the quickest.
DeleteAs is historically correct... 'Hey Johnny Cope, are ye wauking yet..'
DeleteAye, that it is. There is a slim chance that the Redcoats can get out of it, but it is VERY slim
DeleteI like the way your status markers blend in with the green of the the playing surface ...
ReplyDeleteThanks! I scanned the cloth colour and then found the nearest Pantone colour. That's a bit geeky, isn't it?
Delete