The last few months has all been Spanish Civil War. The rules are out there now, and I really should be running games and writing posts to promote them, sharing far and wide. In practice the steam's gone out of me a bit having finally got them over the line. In any event, the review copies aren't with the reviewers yet, and my personal stock is still at the printers. My one criticism of the Amazon process is that "Author Copies" take about three-four weeks to turn up, whereas retail copies off the website take about two days. which mans that people out there have seen the final product before me. Ho hum.
Any how, I felt like I needed to do something different for a change, so I pulled out "It's Getting A Bit Chile". It's been a year since I last played a game with them, so it was about time to show them some love (plus I have a magnificent terrain piece not used in anger yet). I needed a bit of a read through, before we began, but it soon all came back to me. Mostly.
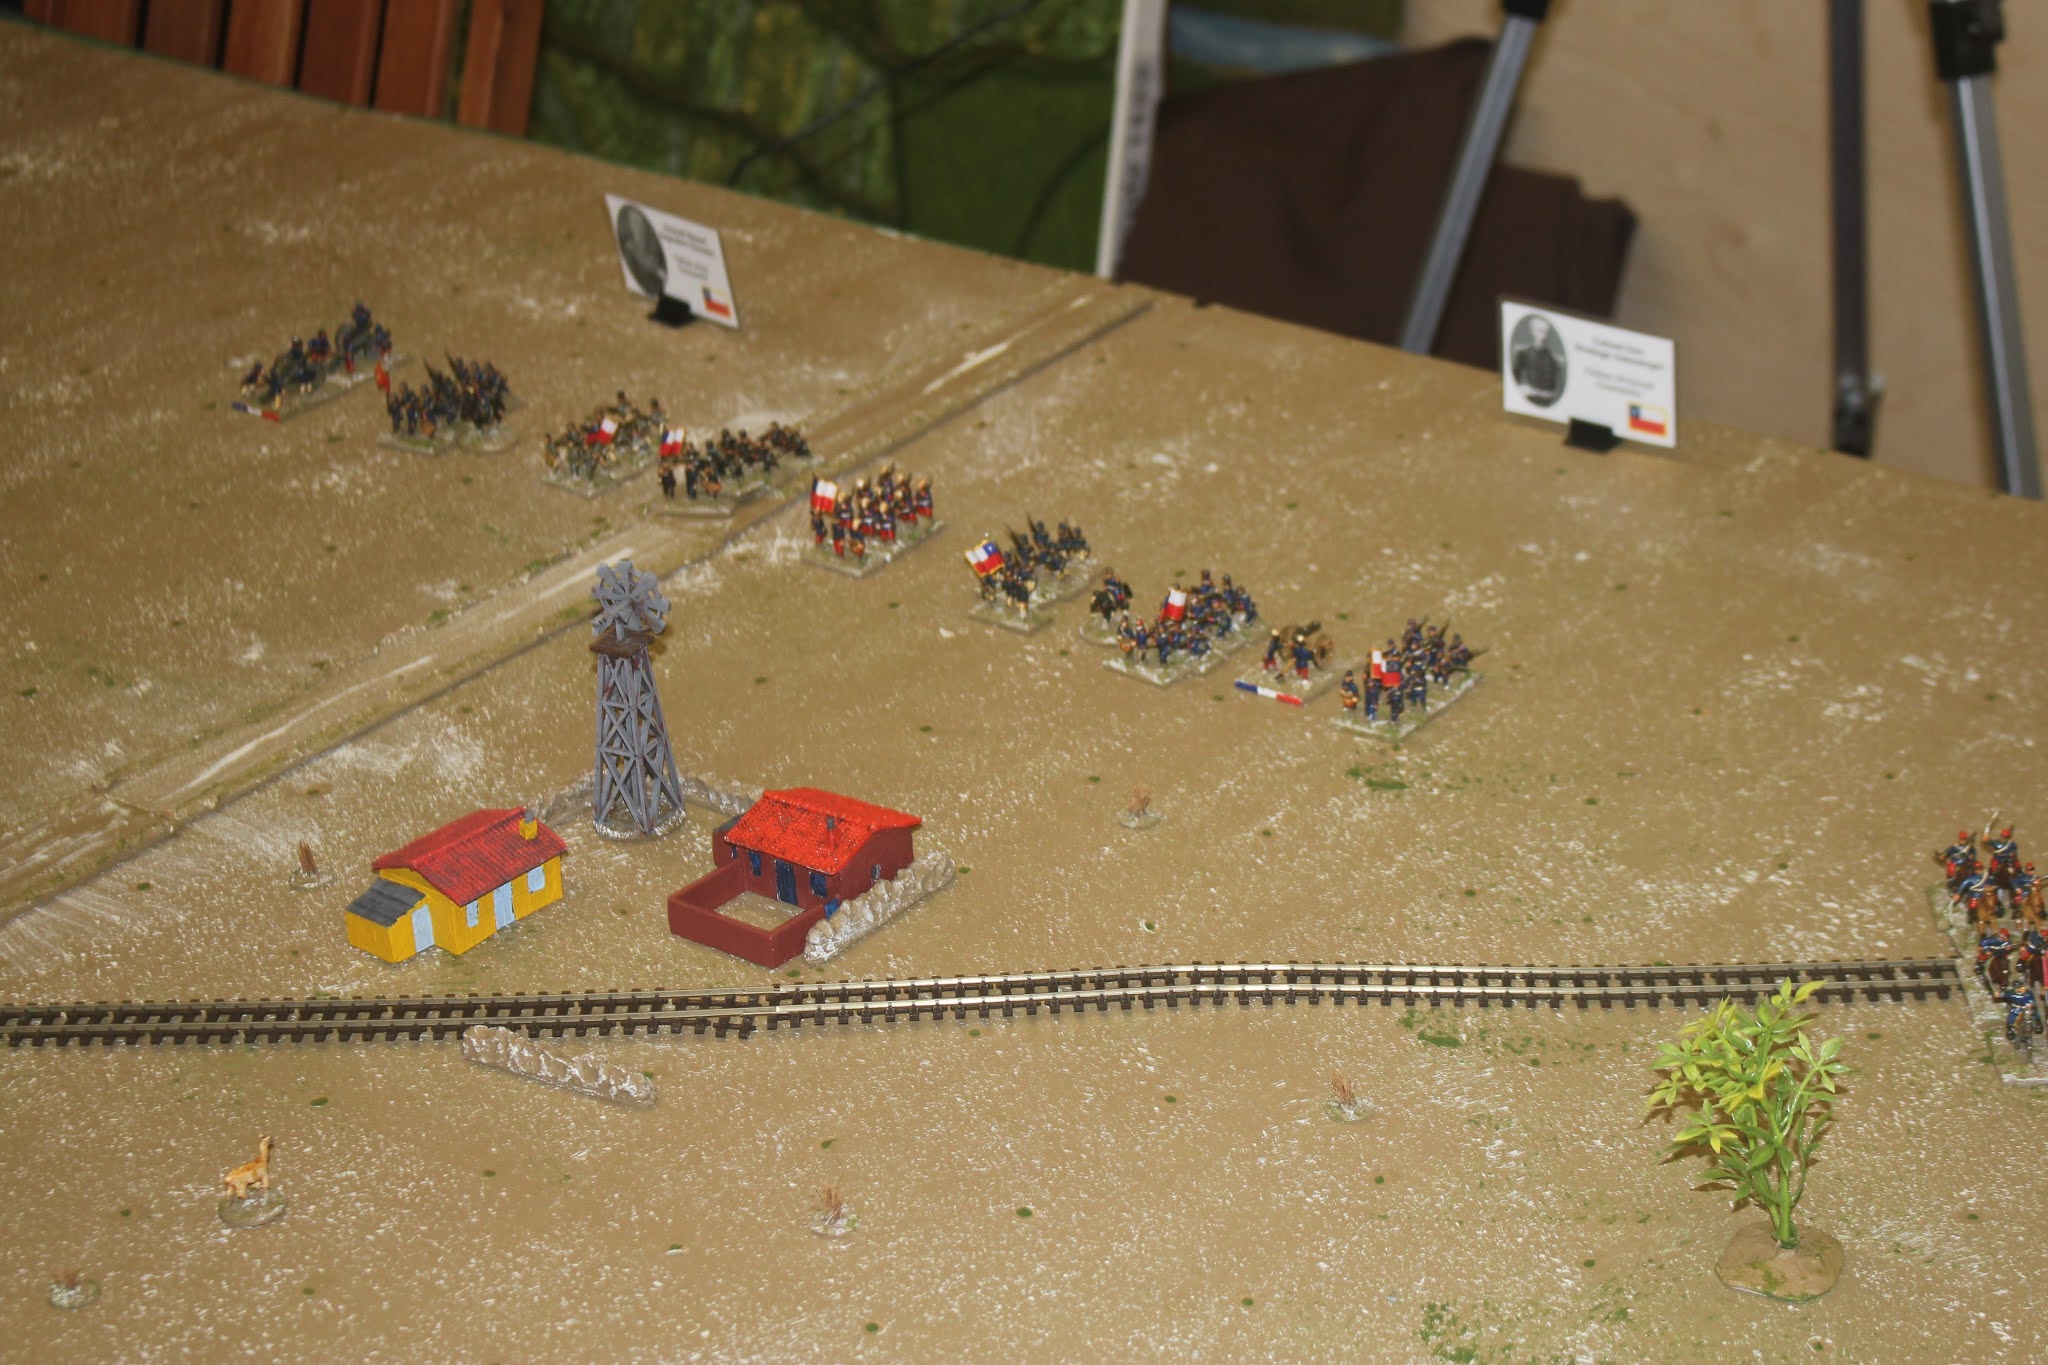
I set up for four players, with a couple of brigades a side. The table was almost symmetrical. There are two
officianas (mining stations), a llama pen, and a Jesuit cathedral on a hill. The
officianas have my "new" wind pumps that I got from
Blotz at the last wargame show I attended before lockdown last year. They're mdf, and come in a £3 each. Compare that to the the cost of the model railway accessory equivalent, and you'll see they're an absolute bargain.
Each brigade had a commander, so we were slightly heavy on the officer cards available for the game.
Steve, Will and Richard were the Chileans. Richard had the cavalry, Will the Chilean right (plus he was army commander) and Steve the left.
Turn one and Richard sends his cavalry off to sneak through the hills.
The rest of the Chileans press forwards to occupy the officiana nearest them. Will mistakes the llama pen for a village, but once that's cleared up, he's off to sort out Ian, who has the Bolivians opposite him.
Ian and Jon (who has the Peruvians on the left in the distance) also pressed forwards with alacrity.
Richard's cavalry continued their flanking movement.
Jon soon had all of his chaps in Open Order, and was inching out towards his right. Steve had pushed quickly into the mining compound. Will had deployed into attack columns (he'd read his commander card properly). Opposite him, Ian was moving through the mine nearest him.
As Jon advances, Richard is lurking. He's hoping for the initiative rolls to enable him to get a "flip-flop" turn.
Firing has broken out along the line. Disorder markers start to appear.
Will has his artillery pounding the mine compound. Ian has finally dragged his guns into position. Will's attack columns are taking some stick.
Jon has now got his men ringing the compound occupied by Steve. The firing is intensifying.
Over on the left again, and it's all got too much for one of Will's columns, and it breaks and runs. Questions will be raised about the cost of the General's preferred bayonet based tactics.
It's getting more chaotic round Steve's end of the table. He needs to get a grip before he is forced out by weight of fire. His commander enters the fray, and orders his men to dig in properly, and fortify the compound.
At last! Has the moment come? Richard's cavalry emerge from the valley between the hills (which are only there to keep the edge of the matt flat. It's been rolled up for 12 months).
Undaunted by the rout of one of his columns, General Baquedano orders his men to charge home. Ian's men pour fire into them, but Will's general has the ability to make his men ignore some Disorder when they are in the first round of hand to hand combat.
The Bolivians retreat before the bayonets of the Prussia of South America!
The retreating Bolivians are driven back further, but the General takes a wound.
Richard, on the other flank, has managed to charge home into the rear of some Peruvians in open order. Brave fellow.
Back on the other side again, Will's General orders two more columns in to attack Ian's infantry. Already slightly rattled, this will not go well for the men in yellow.
Howling their fearsome battle cries, Richard's cavalry drive their opponents before them.
The yellow regiment has been forced backwards, and Will's other attack column has now finally broken their opponents for good. The remaining attack column, which had been loaned by Steve, was surplus to requirements, but is now lining up a charge on the officiana occupied by Ian. Only he hasn't actually given the order to occupy and fortify himself in it, preferring instead to keep firing. Could this cost him?
Elsewhere, more slaughter ensues.
Jon's remaining men keep up the fusillade, but now Steve has sorted himself out properly, this is a tough target. Especially as Jon has no heavy artillery, just Gatling Guns.
Will leads that attack column of Steve's into the mine, overwhelming the defenders and overrunning their artillery. Ian's delay in fortifying the position has cost him dearly. A third successful charge for Baquedano. This is the most effective use I've ever seen of his special ability. Brilliant performance, Will.
Those infantry just keep on running.
And, as it says in the rules, if you ever do succeed in capturing a compound, make sure you put your flag on the roof.

The Chileans now hold both compounds, more or less, and just under half of the Allied forces are fleeing, so it looks like a decisive win for them. That victory seemed to come out of no-where, but in the end it was well constructed. Jon was kept out on the right by slightly inferior forces, whilst Will turned his narrow advantage in numbers to his advantage, by judicious use of his commander. An excellent little game.
Well, I enjoyed it.
***Please Note: No llamas were hurt during the course of this game***


That sounds like a lot of fun. Nice terrain and figures too. Where did you get the figures from?
ReplyDeleteThey're from Outpost. The range was made as a result of a commission. The buildings are Irregular.
DeleteThat was an enjoyable contest and we were soundly bettered by our opposition. Will fought like a man possessed. Seeing your troops and table in the close-ups is a treat.
ReplyDeleteInitiative worked against poor Ian and myself. First, three players rolling against two for top die is bound to favor the more numerous. Second, NOWHERE that I can find does an initiative roll and assessment even feature in the rules. It looks like a straight IGO-UGO alternating turn setup with no choosing first or second player based upon winning initiative. Therefore no chance of a back-to-back turn. Where is initiative defined?
My mistake. You are right on the initiative. I'm afraid that I had a rule fragment from another system stuck in my head, so you were hard done by there. It is a straight IGO UGO to prevent exactly what happened with the cavalry.
DeleteI thought that Will had got it wrong with his attack plan, and needed a screen of skirmishers, but Ian blew it a bit by not formally occupying the buildings.
After playing so many different rules in such a short span, it is very easy to get a mix-up occasionally.
DeleteYes. It's easier with other people's rules. With my own I sometimes forget what mechanisms I've pout in what rule set.
DeleteBeen there; done that!
DeleteGreat report
ReplyDeleteVery nice report and lovely looking table:)
ReplyDeleteThanks. I'm not the most talented of terrain modellers, so that's appreciated.
DeleteThanks for the report, Trebian! I look forward to some more of them plus the SCW.
ReplyDeleteJohn
I shall be mixing it up for the next few weeks, just to keep things fresh.
Delete